Showing posts with label Art Everyday. Show all posts

Monday, January 20, 2014

Strange Selfies

Whenever I sit down to draw or paint, they come.  These faces.  Nameless strangers born onto the page from my pencil or brush.  I wish I knew who they were.  


Are they faces of people I saw somewhere?  Or are they faces of people I have yet to meet?


Sometimes I wonder if they are even mine.  I wonder if they are inside me, waiting to get out, waiting to be named.  What should I call them?  I don't dare give them names.  So they come forward, one by one, birthed onto blank page or canvass or strip of paper I happen to have on hand, accidental childbirths that surprise the hand of the mother that creates them.  


Are they faces of the dead? The ones I sometimes see when when I am not really seeing.  Is this how they want to be remembered? Maybe I should say a prayer after each one is completed - but are they asking for me to pray for them?  Or should I pray for me?  


Wednesday, January 15, 2014

Technique: Image Transfers

When I started art journalling and collage, I was at a loss as to how I could create pages with lovely images.  I had not picked up a pencil to draw anything in years and I was hesitant to "mar" the pristine pages of my chosen art journal with them.  I didn't want to use mostly magazine cut-outs (though there is nothing wrong with using these -- I just prefer to use them less) and neither did I want to go through the trouble of scanning actual photos. Digital art? Hah --  my 3 year old niece knows more than I do about that. 

There were also some images that didn't look good just cut up and glued to a page.  I wanted images with attitude. LOL.

And then I learned that there was such a thing as "transfers".  

I first came across the term while surreptitiously browsing a book on collage.  Intrigued, I sought out tutorials and information on how to do image transfers.  Here are some of the transfer techniques that I use the most:

Gesso Transfer

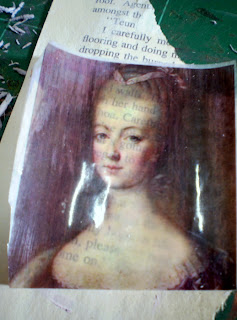
Yup, you guessed it. Gesso, that white substance you use to prime your substrate, is a great transfer agent.  Just slap the gesso on the image, put the image face down on your page and rub over it with a bone folder. Or, if you are like me and you like to find substitutes for tools, in place of a bone folder, you can use the back of a spoon, your fingernail or an old credit card or ATM card.  Gesso transfers, done properly, can give you a pretty crisp image.  Here's one I did using an image of a young mestiza.  The image was printed out on matte photo paper on a colored printer and transferred to a page of an old book I had converted to an art journal.
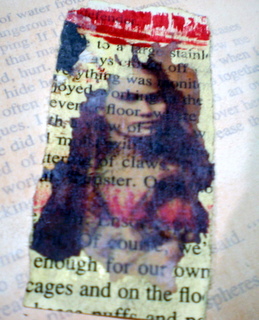

As you can see, the image did not transfer fully but such is the nature of gesso transfers -- there are good ones and then there are the not-so-good ones.  It all depends on the look you're aiming for really.  This particular transfer I categorize under the good ones because I was really aiming for the worn out, distressed look.  There was a bit of red paint smudged on the page but I like it - I think it gave the image more "attitude".  

Tape Transfers

If you want a more complete transfer you can try the tape method.  A roll of clear packing tape (yes - packing tape) about 2 inches wide is all you need for this.  Cut a piece of tape large enough to cover the image you want to transfer and lay this over it. Here's a couple of images already covered with my trusty clear packing tape.
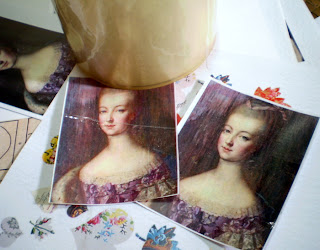
That's my trusty roll of 2-inch clear packing tape at the back
Make sure you rub that tape onto the image well with a bone folder, the back of a spoon or in the case of these two above -- the rounded end of the pair of scissors I had on hand (yeah, yeah -- too lazy to get up and get my bone folder).

Again, there will be peeling and rubbing involved -- not THAT kind so please wipe that dirty smirk off your face.  Wet the back of the paper the image is on and rub the excess paper off gently with your finger.  I say gently because rubbing too firmly will most likely lift the entire image off leaving you with a blank piece of soggy tape.
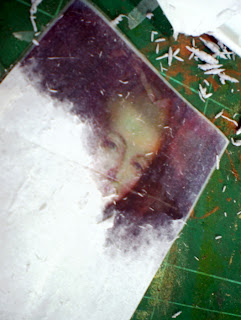
Starting to peel.  (Please excuse my self-healing  cutting mat  - it is well-loved and used much lol)
A tape transfer will give you an almost sheer image and these are great if you want to layer images.  You can just cut off the excess tape (I usually cut around the image loosely), apply watered down glue to it and put it down on the page.  

Here are the two finished transfers.
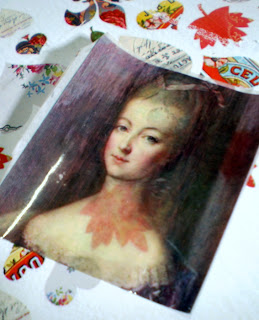
I put this over a page with colored images so you can see how transparent the image of the girl is. 

See how the print on the page is coming through the image?
Acrylic Gel Medium Transfers

This was the very first method I tried and I happened to learn it by accident.  

I got some acrylic gel medium on one of my images by accident and as clumsy as I am, I also got it stuck to a piece of cardstock. Realizing my mistake, I pulled the paper off the cardstock and noticed that parts of the image had been transferred to the blank card stock.  You can bet I never looked at my jar of acrylic medium in the same way after that. 

Simply apply some of the medium onto your image (I sometimes apply some of the medium onto my substrate as well) and slap the image face down on the page.  As with the gesso transfer, use a bone folder or an old credit card to rub the image firmly onto the paper.  Lift one side of the paper and peel the excess off leaving the image on your transfer surface.  To get more of the excess paper off, dampen the back of the image with water and rub gently with your finger.

This image was transferred onto a page I tore out of one of my altered book journals


You can also coat your image with the acrylic gel medium.  Just slap on at least 4 layers of the medium (make sure each layer is completely dry before you add another on top), turn the image over and gently peel the paper at the back of the image after getting it wet with water.  This results in what I call a "skin" -- an almost transparent image on a very, very thin sheet of medium.  It is quite fragile so I keep these sandwiched in between pages of an old book to keep them from tearing.

This is what it looks like while the acrylic medium is drying ( if you are not the most patient person in the world, a hair dryer set to the lowest setting can speed things up)


Here's the little girl on the image -- she's starting to show through!


And here is the finished "skin"


So now you're probably asking yourself -- what am I going to do with these? I'll give you a few suggestions in the next post.  And I promise it won't be months from now. :-)

Tuesday, January 1, 2013

Quick Question to One Who Feels Small

You only see the lines on your face, reminding you of deep hurts and time that marched on leaving you behind.  Your eyes see mostly dark, though light shines from them allowing others to see.   You only see the scars on your face as they are marked in your heart.  You see yourself as unworthy, unlovable, the one who will always walk alone, the one least favored.

So explain to me then, if what you think is true, if you are as you say, so insignificant - why have the stars chosen to nestle in your hair?

mixed media on canvas, dec 2012
 

Monday, March 26, 2012

Technique: Image Transfers

When I started art journalling and collage, I was at a loss as to how I could create pages with lovely images.  I had not picked up a pencil to draw anything in years and I was hesitant to "mar" the pristine pages of my chosen art journal with them.  I didn't want to use mostly magazine cut-outs (though there is nothing wrong with using these -- I just prefer to use them less) and neither did I want to go through the trouble of scanning actual photos. Digital art? Hah --  my 3 year old niece knows more than I do about that. 

There were also some images that didn't look good just cut up and glued to a page.  I wanted images with attitude. LOL.

And then I learned that there was such a thing as "transfers".  

I first came across the term while surreptitiously browsing a book on collage.  Intrigued, I sought out tutorials and information on how to do image transfers.  Here are some of the transfer techniques I use often.

Gesso Transfer

Yup, you guessed it. Gesso, that white substance you use to prime your substrate, is a great transfer agent.  Just slap the gesso on the image, put the image face down on your page and rub over it with a bone folder. Or, if you are like me and you like to find substitutes for tools, in place of a bone folder, you can use the back of a spoon, your fingernail or an old credit card or ATM card.  Gesso transfers, done properly, can give you a pretty crisp image.  Here's one I did using an image of a young mestiza.  The image was printed out on matte photo paper on a colored printer and transferred to a page of an old book I had converted to an art journal.


As you can see, the image did not transfer fully but such is the nature of gesso transfers -- there are good ones and then there are the not-so-good ones.  It all depends on the look you're aiming for really.  This particular transfer I categorize under the good ones because I was really aiming for the worn out, distressed look.  There was a bit of red paint smudged on the page but I like it - I think it gave the image more "attitude".  

Tape Transfers

If you want a more complete transfer you can try the tape method.  A roll of clear packing tape (yes - packing tape) about 2 inches wide is all you need for this.  Cut a piece of tape large enough to cover the image you want to transfer and lay this over it. Here's a couple of images already covered with my trusty clear packing tape.

That's my trusty roll of 2-inch clear packing tape at the back
Make sure you rub that tape onto the image well with a bone folder, the back of a spoon or in the case of these two above -- the rounded end of the pair of scissors I had on hand (yeah, yeah -- too lazy to get up and get my bone folder).

Again, there will be peeling and rubbing involved -- not THAT kind so please wipe that dirty smirk off your face.  Wet the back of the paper the image is on and rub the excess paper off gently with your finger.  I say gently because rubbing too firmly will most likely lift the entire image off leaving you with a blank piece of soggy tape.

Starting to peel.  (Please excuse my self-healing  cutting mat  - it is well-loved and used much lol)
A tape transfer will give you an almost sheer image and these are great if you want to layer images.  You can just cut off the excess tape (I usually cut around the image loosely), apply watered down glue to it and put it down on the page.  

Here are the two finished transfers.

I put this over a page with colored images so you can see how transparent the image of the girl is. 

See how the print on the page is coming through the image?
Acrylic Gel Medium Transfers

This was the very first method I tried and I happened to learn it by accident.  

I got some acrylic gel medium on one of my images by accident and as clumsy as I am, I also got it stuck to a piece of cardstock. Realizing my mistake, I pulled the paper off the cardstock and noticed that parts of the image had been transferred to the blank card stock.  You can bet I never looked at my jar of acrylic medium in the same way after that. 

Simply apply some of the medium onto your image (I sometimes apply some of the medium onto my substrate as well) and slap the image face down on the page.  As with the gesso transfer, use a bone folder or an old credit card to rub the image firmly onto the paper.  Lift one side of the paper and peel the excess off leaving the image on your transfer surface.  To get more of the excess paper off, dampen the back of the image with water and rub gently with your finger.

This image was transferred onto a page I tore out of one of my altered book journals


You can also coat your image with the acrylic gel medium.  Just slap on at least 4 layers of the medium (make sure each layer is completely dry before you add another on top), turn the image over and gently peel the paper at the back of the image after getting it wet with water.  This results in what I call a "skin" -- an almost transparent image on a very, very thin sheet of medium.  It is quite fragile so I keep these sandwiched in between pages of an old book to keep them from tearing.

This is what it looks like while the acrylic medium is drying ( if you are not the most patient person in the world, a hair dryer set to the lowest setting can speed things up)


Here's the little girl on the image -- she's starting to show through!


And here is the finished "skin"


So now you're probably asking yourself -- what am I going to do with these? I'll give you a few suggestions in the next post.  And I promise it won't be months from now. :-) 

Monday, March 19, 2012

Little Ladies

A good friend once asked me why I tend to start things small - or expect to stay small.

Maybe because I don't think I'm good enough to make it big. Or maybe because I know I can and I'm afraid I can't handle what will come.  Or maybe because I'm afraid to make big mistakes -- because little ones are so much easier to correct and don't make me look as stupid as I feel.  Or maybe I don't really want anyone to see -- or maybe I do but I'm choosy about the people I want to share it with.  And I'm choosy about it because maybe I'm afraid of them judging me and calling me crazy to even think I can do anything amazing.

And maybe this line of thinking is going to get me nowhere.

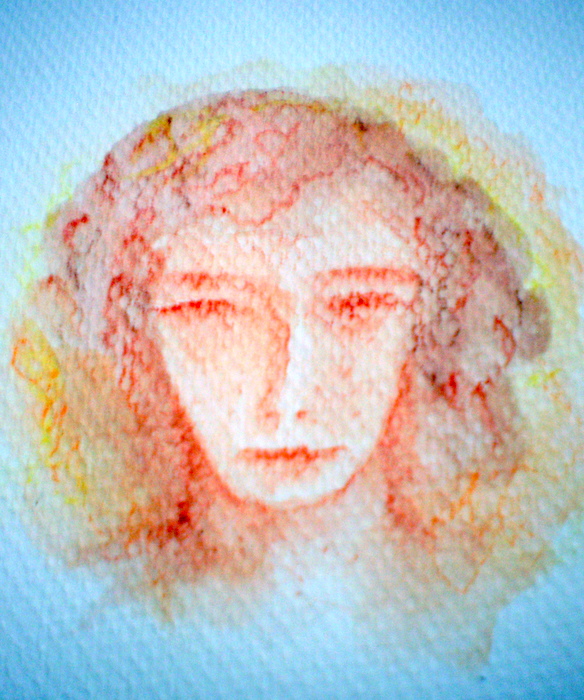
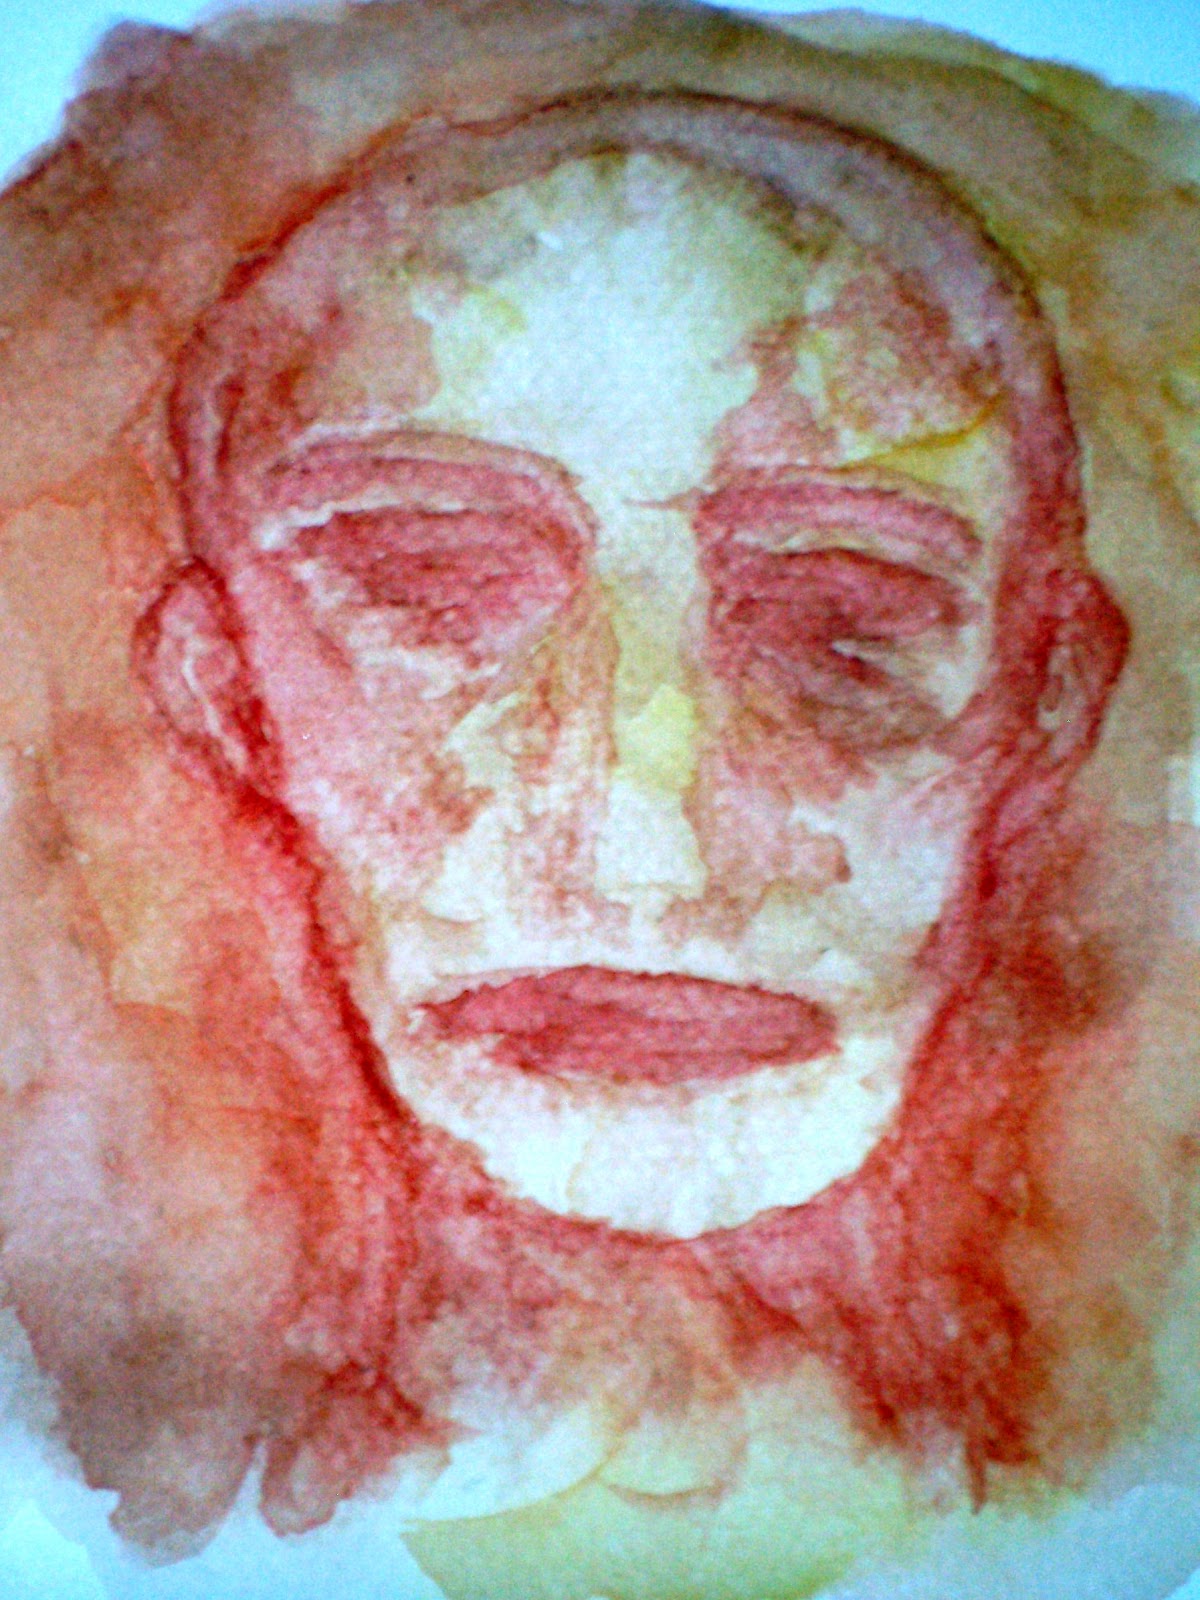
And since old habits die hard, I started a series of small drawings using a set of aquarelle pencils I got for my birthday.  Really small -- about 2 inches wide by 2 inches tall.  I call them The Little Ladies.

Attempt No. 1


Here's No. 2
And No. 3
I liked that I could first lightly draw the image outline with a dry aquarelle pencil then run a damp paint brush over the lines to shade or lighten them as I pleased.  You do know how scared I am of watercolor right? So this medium gave me some control and was less scary for me. 

I like. :-)  Will definitely need more practice though.  And maybe I'll try to draw something bigger than 2 inches with these next time. 

Monday, March 12, 2012

Five Minutes

It has been months since I last posted. It actually feels like years.

So much has happened since November and it seems that the avalanche of new things, new people in my life, new experiences and yes, even new hurts, is not about to stop or slow down. Overwhelmed, you ask? No -- amazed is more like it.

Because of this amazing avalanche, I had to put a few things I love to do on the shelf  for a bit.  But now they call to me and I am, once again, smitten.

But it still is a busy time so I promised myself to put in at least 5 minutes each day into doing something creative, something to feed that part of me that the avalanche of newness can't.  I missed it -- getting lost in paint and paper and pencil and glue and goop. I guess it missed me too.

Five minutes to create something. As usual, I made faces:


There. That's two days worth of creating.

My alarm just went off. Five minutes are up.  This blog post is today's 5 minutes. :-)

Sunday, September 4, 2011

Art Everyday: Making Friends with Watercolor

There are several things I'm afraid of: sharks, deep, dark water (and sharks!), earthquakes, snakes, rats, riding in a speeding car (or running alongside one especially one of those buses along EDSA) and watercolor.

There has always been something that scared me about watercolor.  I don't really know what but to me it seemed like a difficult monster to tame. So of course I set out to see if I could make friends with it.  It's a new month after all -- and I was scouting around for a brave thing to do this month.

What really motivated me to try it was watching my two year old niece slap watercolor on like it was the easiest thing in the world.  And while it's true that her artwork consisted mostly of squiggles of color (she insists they are paintings of Rio, her favorite parrot), I tried to see what it was that made her so fearless.

It was simple. She didn't care.

She simply slapped that paint down and dipped that brush into the pots of paint, not worried about how they would look like on paper.  She was painting for herself, enjoying the moment and not even bothered that her older sister taunted her about how "unbirdlike" her paintings were.  They were paintings of PARROTS. 'Nuff said.

I went back to being two years old and decided the best way to confront the beast was to play. And I did. The first try, done in between finishing up a custom order for brooches last week, did not go too well -- sort of like an awkward introduction at a party. A quick slap-dash piece that quickly ended up looking like - well, strange.  I recovered quickly.  I wasn't going to let this dismal failure get to me. Channeling my inner two year old, I tried again.  It worked and I was able to make a semi-decent face. It's the one on the left-hand side in case you couldn't tell LOL.


I was hooked.  I wanted to play some more.  I actually woke up at 3 AM this morning wanting to paint.  I came up with this -


My niece had it all figured out I guess.  Making friends with watercolor was no longer as daunting as it seemed.  I think we actually had a conversation in this last piece.

Now, about that fear of sharks ----

Monday, August 29, 2011

Art Everyday: Transformers

In one of my posts, I wrote about trying out a technique I read about.  It involves cutting out a magazine image and then painting or drawing over it.

I started out with this photo from a fashion magazine of a male model. What attracted me to this image was how androgynous he looked. (And how he looked like he stepped out of the '80s! LOL)


Look at that hair! 

I wanted to turn him into something unrecognizable and totally different from the original photo. So out came the bucket of gesso and a few coats later, I can fairly say, he's starting to look like a ghost of his former self.


Still wanting to alter this image some more, I dove in with more paint and put in a totally new face with my 5B pencil.  Do you still recognize him?


The initial intention was to turn him into a girl, with rouged cheeks and ruby red lips. Tough luck on that one.  I think my muse knew better :-).

But I did like how the face turned out.  Seemed to have more character and a smidgen of angst.  Now I don't really know why but the wings came next.  And in the end "he" ended up looking like this


If you're not that confident with your drawing skills (like I am) and painting a person from scratch gives you the chills, this is a great technique to try.  Having the original face and figure as a guide gave me the confidence to "draw" in a new one without having to worry about stuff like proportion and anatomy.  I think I'm going to do a few more of these until I gain enough gumption to draw a human figure from scratch.    

Monday, August 15, 2011

Art Everyday: Art Journals for Cheap

You know I love blank books and notebooks -- the kind with no lines. The plainer the page, the better for me. Looking at a blank page and knowing I can do anything with it -- oh the giddiness of it all!

But blank journals (especially those Moleskine ones) are quite expensive and there is something to my frugal upbringing that squirms each time I try to buy one of those. The thought of slapping paint and paper and filling something with a price tag like that makes me squeamish.  So where do I get my blank book fix?

I make them - out of old books that no one wants to read.  Books that will most likely be tossed into the landfill and left to rot. Old books that cost about P25.00 each over at the second hand books bin. I like the thought of giving these babies a second life.

I do pick them carefully. I always choose the ones with a sewn binding, never the ones that are just glued to a hard spine.  These (the glued ones) tend to self-destruct within 10 seconds of the first application of gesso. The ones with the sewn binding last - well, forever. And they can withstand the tortures I put these books through.  It's also easier to cut out pages to make a thinner book -- the better to add bulky collage elements in.  The kind of book or what it's about also counts for me.  The one I am currently working on used to be a hardbound novel with the title "Point of Origin". I picked it because I felt that it went with what I was starting -- a new journey.

To turn it into a blank art journal, I first take the old, trusty glue stick and glue two or more pages together.  Old book pages can be very porous and gluing two or more pages together makes for a stronger, sturdier substrate that can take paint and water better without fraying or tearing.  Next, one of my favorite parts -- glopping on the gesso.  I love gessoing the pages.  The repetitive movement of brush gliding on the page is almost meditative (to me at least! LOL).  The pages look like this after two very thin coats:


Then it's time to work on the backgrounds.  I spend my weekday evenings working on backgrounds. I love putting on layers and glazes of paint on the page.  And sometimes, to add a little texture, I lay some sheer tissue paper on top of the painted page and crumple it a bit. Two background pages I made last week had that textured look I like.  I stamped them with my wooden stamps from India.


Here's a page with just a plain background (for now).  I still don't know what else I want to do with it


You can use a brush or even a clean kitchen sponge to apply paint.  I keep several cut-up kitchen sponges handy just in case I want to pounce the paint on.  Using a sponge can give you really cool effects and textures.    If you want to go for an antiqued look, you can stain your pages with tea or even coffee.  I sometimes use coffee grounds to do this -- just get some damp coffee grounds and smoosh them on the page.  Messy - yes. But it's fun -- it's play.

And that's what I was up to the past week.  After this post, I'll be going back to my work table to finish something I started over the week-end.  It was an experiment of sorts, just trying out a technique I saw while nosing around, but I like how it turned out.

And tomorrow -- I'm going to take a trip to the used books store to pick up a few more of my "artsy-fartsy journals" in the making.

Sunday, July 31, 2011

Art Everyday: Becoming More Daring with Noses

The obsession is still on with noses.  This time, I wanted to draw it in profile.

So on a rather long, boring day I managed to give it a try


I think this one is quite okay - first try, beginner's luck. It's far from perfect and I don't want any of what  I draw to be.  It's the little imperfections that make it real to me.

Drawing the eye on this one was a blast though -- so I think I know what my next obsession will be.


Sunday, July 24, 2011

Art Everyday: Trapped? (A Couple of Pages from My Art Journal)


Seriously, you expect me to be quiet?


And do you really think I will never, ever fly?

I'm growing my wings now. And my voice is no longer the raspy whisper it used to be.  
Soon. 

Monday, July 18, 2011

Art Everyday: Sniffing Out the Perfect Nose

For some reason I’ve been obsessed lately with perfecting the NOSE.  Looking at my past drawings, I realized that in the faces I drew, the nose was usually represented by either an L-shaped, slightly askew line 


or a squiggle with some shading to show the outline of what I hoped looked more or less like a nose.      


And while they work for me (I sort of like the whimsy that a squiggled nose evokes), I figured it would not be a bad thing to learn how to draw a nose correctly – or, should I say, a little more accurately than a squiggle.

As I’ve mentioned in a previous post, I have never had any formal art lessons.  At the rate these cost, I don’t think I ever will get the chance to attend any LOL. But if one is resourceful enough (okay, obsessed enough in my case), there’s no reason not to find and get what you need.   I wanted to draw a nose properly – so I went to look for someone to teach me.

I found my teachers on the internet of course.  There are tons of free tutorials on just about anything on the net and   this tutorial video by Dan Nelson  was particularly helpful to me.

My eyes bleary from watching the tutorials , I bravely took one of my sketchbooks and sat myself down to draw me a perfect nose. 

It wasn’t easy.   

The first few still looked like squiggles.  Only this time they looked like properly shaded squiggles.
I tried again.  And I think I managed something quite decent.  Rather crooked, but a bit decent.


And again. And again. And again.


I never thought I’d knock  myself out drawing noses.  But I did.


After two days of shading in nostrils, trying to shade in a proper philtrum ('ya know – that little indentation between the nose and the mouth?)  and kicking myself for drawing yet another version of the Wicked Witch of the West’s nose, I think I finally have the hang of it.


I think.